
Updated September 2025: This guide to indigo tie dye patterns and techniques has been refreshed with new tips, updated washing instructions, and FAQs to help your projects last longer.
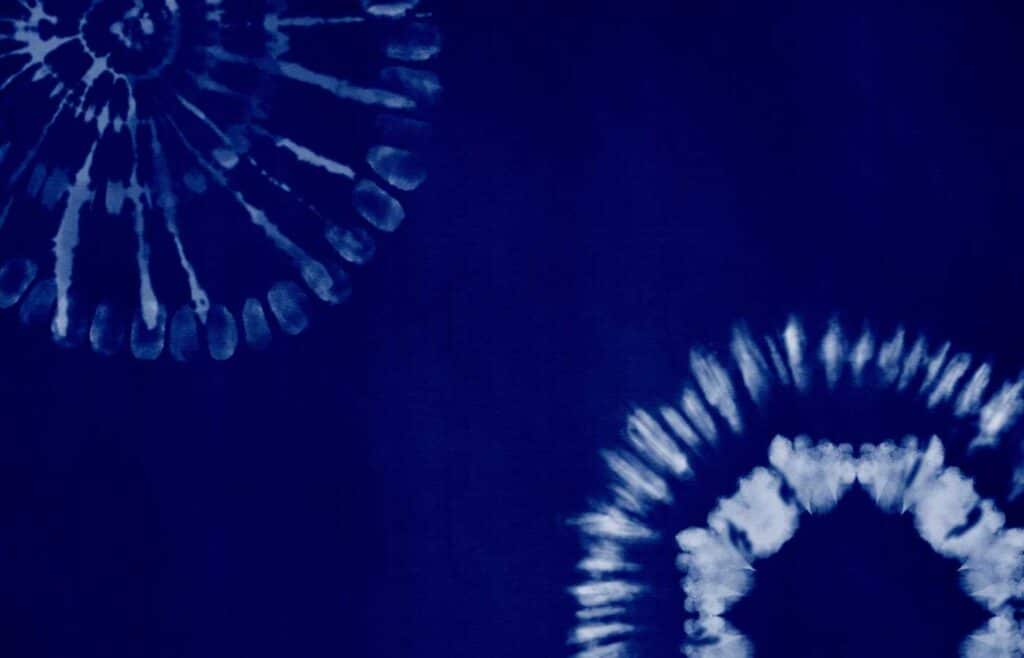
Indigo tie dye patterns are a timeless way to transform plain fabric into something bold and beautiful. This ancient dyeing method, with roots as far back as the 8th century, uses natural indigo to create deep blue shades and striking resist designs.
With a simple indigo tie dye kit, rubber bands, and a little creativity, you can make classic spirals, bullseyes, Shibori-inspired folds, and more. These projects are easy enough for beginners and fun for kids, making them a perfect hands-on craft that blends art and history.
In this guide, you’ll learn 10 of the best indigo tie dye patterns – from traditional Japanese Shibori techniques to playful designs like sunbursts and pebbles – along with step-by-step instructions to help you create your own unique fabric masterpieces.
Let’s dive in!

Indigo dyeing is an ancient art form that kids can master, along with many other creative skills featured in our complete children’s at-home activity resource.
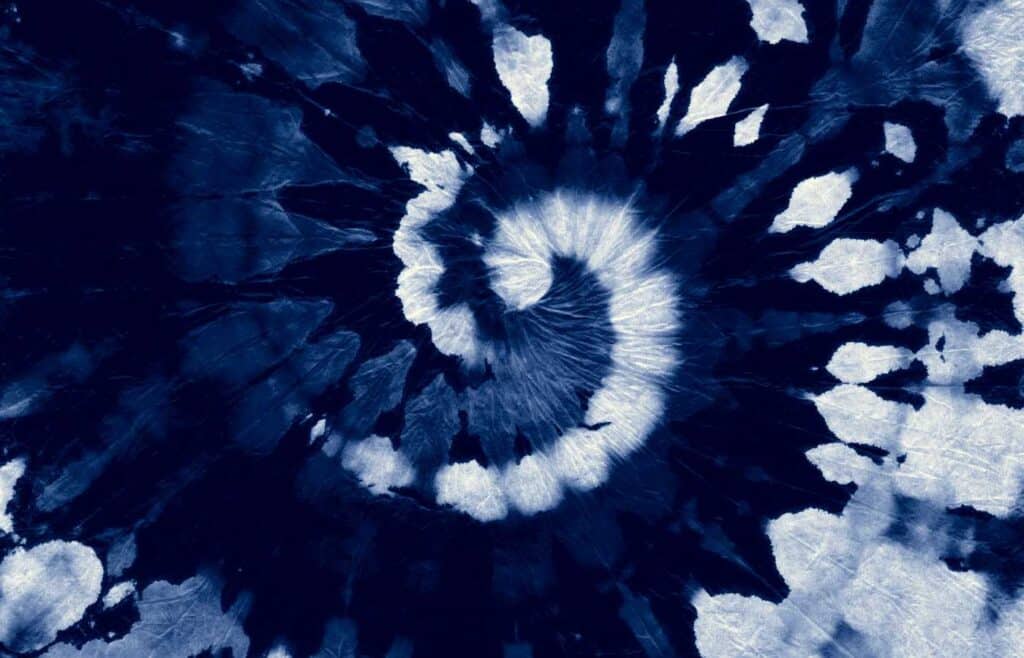
Indigo Tie Dye Spiral Pattern (Step-by-Step)
This is a classic design that uses a central twisting technique.
- Preparation (optional) : Pre-wash your natural fiber fabric with mild detergent, rinse in cold water, and let it dry completely.
- Twist: Pinch the center of the fabric, and twist it in a circular motion to form a spiral shape.
- Secure: Use elastic bands to hold the fabric in place, sectioning it into pie-like wedges.
- Prepare Dye Bath: Following the instruction booklet in your tie dye kit, mix the pre-reduced indigo dye with sodium hydrosulfite and soda ash to create the dye vat.
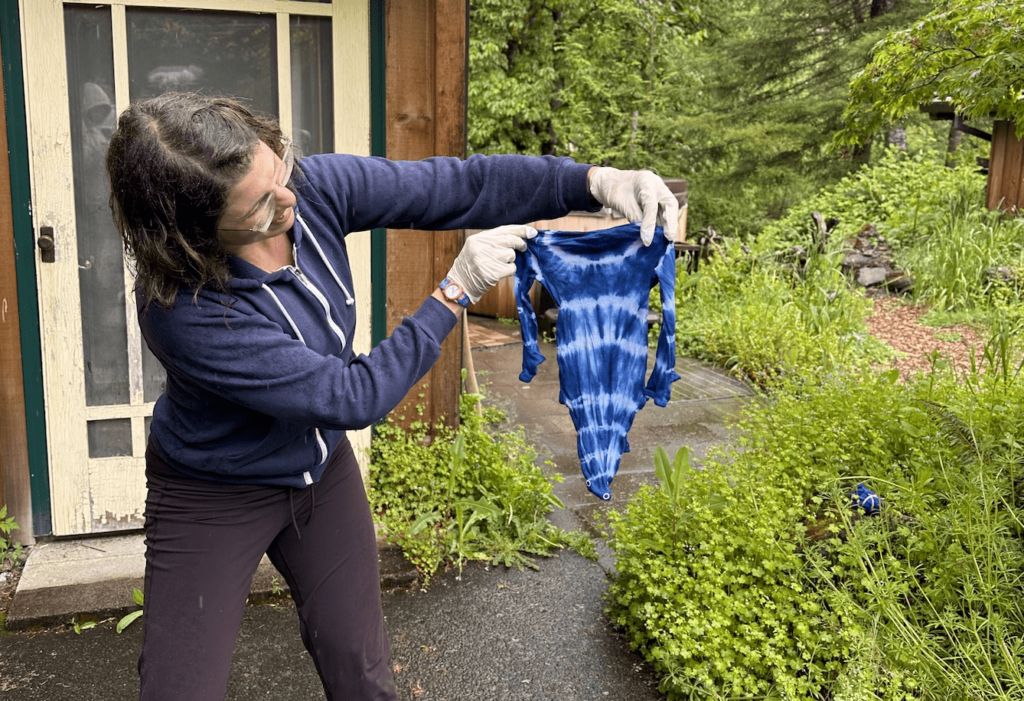
- Dye: Wearing a pair of gloves, dip the spiral into the dye bath for the desired number of dips. The more dips, the darker it will get.
- Rinse & Dry: Rinse the dyed fabric in a bucket of clean water, then hang dry for a beautiful finished product.
Shibori-Inspired Folded Pattern
This is a traditional Japanese technique using folding and binding.
- Preparation (Optional): Pre-wash your fabric with mild detergent, rinse, and dry thoroughly.
- Fold & Bind: Fold the fabric into accordion folds or pairs of shapes, securing it with binder clips, pieces of wood, or PVC pipes for the resist technique.
- Dye Bath Preparation: Mix the indigo kit components (soda ash, sodium hydrosulfite, and pre-reduced indigo) in warm water to prepare the dye vat.
- Dye: While wearing gloves, submerge the folded fabric in the dye bath and let it soak for a few minutes. Repeat the dips for darker shades.
- Rinse & Dry: Rinse in clean water, unfold carefully, and hang dry for a striking shibori pattern.
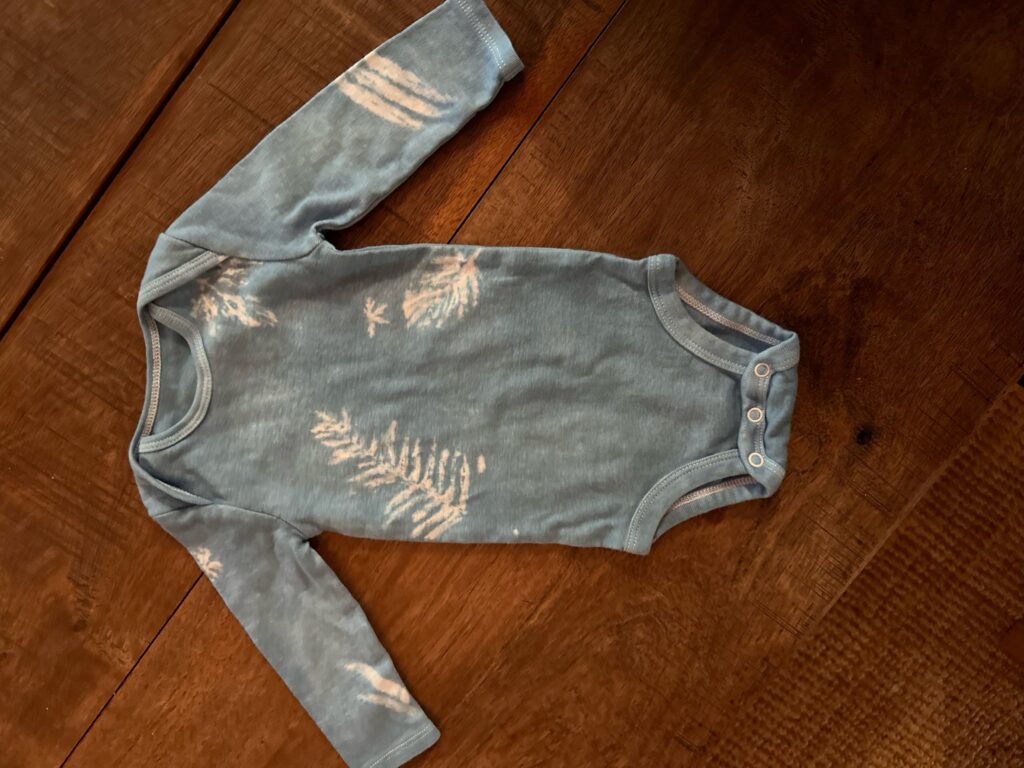
Indigo Tie Dye Leaf Print Pattern
- Preparation (Optional): Pre-wash your fabric using mild detergent, rinse in cold water, and dry completely.
- Arrange Leaves: Lay your fabric flat and arrange leaves or other natural items on it in desired patterns. Choose leaves with distinctive shapes or veins for the best effect.
- Secure: Use a resist technique like securing the leaves with weights or pressing them between wood blocks to keep them in place.
- Prepare Dye Bath: Mix pre-reduced indigo dye, soda ash, and reactive dyes per the dye kit instructions to create the dye bath.
- Dye: Wearing gloves, submerge the fabric into the dye bath and let it soak for the desired number of dips.
- Rinse & Dry: Rinse in a bucket of clean water or use a washing machine. Hang dry, then carefully remove the leaves to reveal the leaf prints.
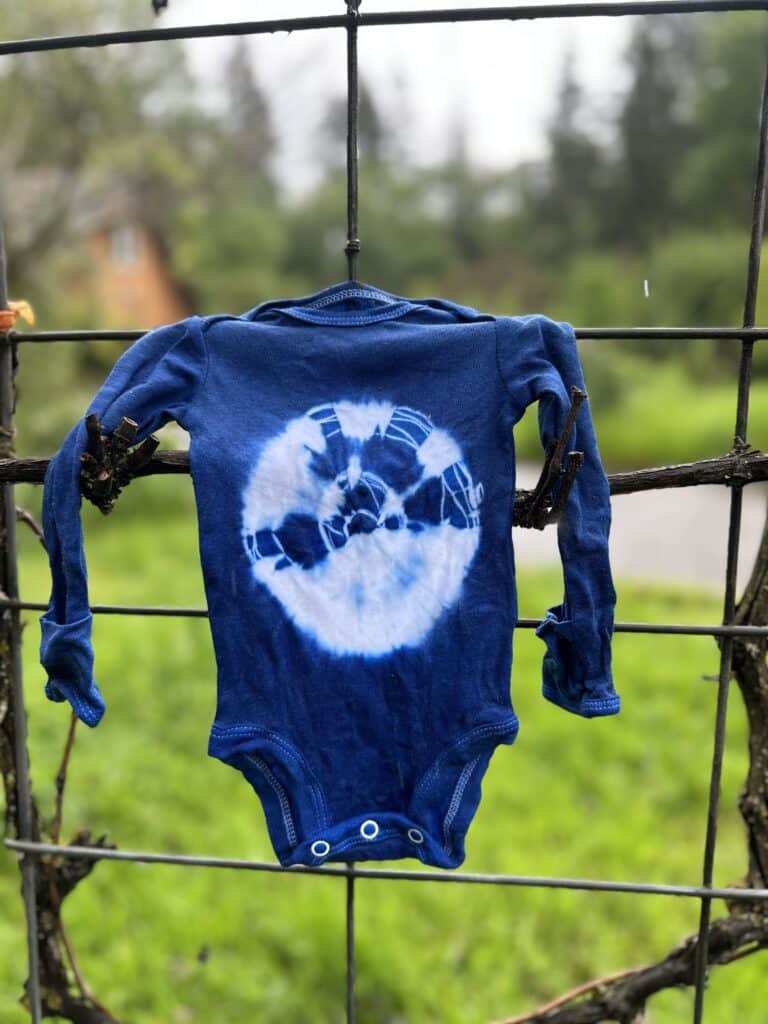
Indigo Tie Dye Bullseye Pattern
This involves concentric circles made by binding sections at intervals.

- Preparation (Optional): Pre-wash the fabric, rinse it in cold water, and dry completely.
- Bind: Pinch the fabric at the desired center point, then tie elastic bands at regular intervals outward to create concentric circles.
- Prepare Dye Bath: Create an indigo vat by mixing pre-reduced indigo dye with soda ash and sodium hydrosulfite.
- Dye: Wearing gloves, dip the fabric into the dye bath, letting it sit for the desired number of dips.
- The more dips, the darker it will get.
- Rinse & Dry: Rinse with a bucket of clean water, then remove the bands and hang dry for beautiful bullseye patterns.
Pebble Tie Dye Pattern with Indigo Dye
This unique pattern looks like a polka dot pattern, but more interesting.

- Preparation (Optional): Pre-wash the fabric using mild detergent, rinse thoroughly, and let it dry completely.
- Fold & Secure:
- Lay the fabric flat on a clean surface.
- Place several small stones or pebbles randomly across the fabric, where you want the polka dot-like pattern to appear.
- Wrap each pebble tightly with an elastic band or string, securing the fabric firmly around each one to create a resist effect.
- Prepare Dye Bath: Using the instruction booklet from the indigo dye kit, mix pre-reduced indigo dye, soda ash, and reactive dyes to form the dye vat.
- Dye: With gloves on, dip the fabric into the indigo vat. Let it soak for the desired number of dips to achieve beautiful shades.
- Rinse & Dry: Rinse thoroughly in a bucket of clean water or washing machine, then remove the elastic bands and pebbles. Hang dry to reveal the pebble pattern, resembling playful polka dots.
This method will produce charming, irregular dot patterns that stand out beautifully on any indigo tie dye fabric.
Indigo Tie Dye Chevron Stripes
This will create alternating diagonal folds for zigzag stripes.
- Preparation (Optional): Pre-wash your fabric item using a mild detergent, then rinse and dry completely.
- Fold:
- Lay the fabric flat on a clean surface.
- Start folding the fabric diagonally from one corner to the opposite edge to form a triangle.
- Repeat the diagonal folding in alternating directions, creating a zigzag or chevron-like shape. Keep folds even for a consistent pattern.
- Secure each fold tightly with elastic bands, ensuring that bands are placed evenly throughout the folded fabric.
- Prepare Dye Bath: Mix an indigo dye kit following the instruction booklet to create the dye vat, using natural indigo dye.
- Dye: Using adult supervision if needed, dip the folded fabric into the indigo vat. Let it soak for the desired number of dips to achieve beautiful shades.
- Rinse & Dry: Rinse with clean water, then remove the bands and hang dry to reveal the striking chevron stripes pattern.
Mandala Indigo Tie Dye Design
This technique will create symmetrical patterns that evoke floral shapes.
- Preparation (Optional): Pre-wash the fabric thoroughly with a mild detergent, rinse, and dry.
- Fold:
- Lay the fabric flat on a clean surface.
- Pinch the center point where you want the mandala pattern to radiate from.
- Fold the fabric in half vertically through this center point, then fold it again horizontally or diagonally (depending on the desired shape) to form a quarter circle or triangle.
- Continue folding the fabric into accordion pleats, like creating pairs of shapes. Make sure the folds remain even for symmetry.
- Secure the folded fabric with elastic bands or binder clips at intervals along the pleats, using the resist technique to prevent dye from penetrating certain areas.
- Prepare Dye Bath: Mix the indigo dye kit components to prepare the dye vat.
- Dye: Immerse the fabric into the vat for the desired number of dips, bringing out the unique characteristics of indigo.
- Rinse & Dry: Rinse with clean water, remove the bands, and air dry to uncover the mandala’s beautiful results.
Indigo Tie Dye Diagonal Stripes
This technique involves simple diagonal folds tied at regular intervals:
- Preparation (Optional): Pre-wash your fabric using mild detergent and rinse in cold water before drying completely.
- Fold & Secure: Fold the fabric diagonally and tie at regular intervals using elastic bands for a consistent tie dye pattern.
- Prepare Dye Bath: Following the user-friendly formulation in the instruction booklet, create an indigo dye bath by mixing the kit components.
- Dye: Immerse the fabric in the indigo vat using the tie-dye technique, allowing it to soak to develop beautiful shades.
- Rinse & Dry: Rinse thoroughly, remove the bands, and hang dry for good quality, diagonal stripes.
Indigo Tie Dye Sunburst Pattern
Create small, radial circles throughout the fabric!
- Prreparation (Optional): Pre-wash your fabric in mild detergent, rinse thoroughly, and dry completely.
- Fold:
- Lay the fabric flat and pinch the points where you’d like each sunburst circle to form.
- Tie each pinched point securely with elastic bands to create small, radial circles.
- Add more elastic bands outward from each center point to create concentric circles.
- Prepare Dye Bath: Using your indigo dye kit, mix pre-reduced indigo dye with soda ash and reactive dyes to prepare the dye vat.
- Dye: Wearing gloves, dip the tied fabric into the indigo dye bath for the desired number of dips.
- Rinse & Dry: Rinse thoroughly in a washing machine or bucket of clean water, remove the elastic bands, and hang dry to reveal the beautiful sunburst pattern.
Geometric Grid Indigo Tie Dye Pattern
Use a Grid-Fold Technique to create repeating squares:
- Preparation (Optional):Pre-wash the fabric thoroughly with mild detergent, rinse, and dry.
- Fold:
- Lay the fabric flat and fold it into long, narrow accordion folds horizontally.
- Once all horizontal folds are made, fold vertically into smaller accordion folds to create a compact grid shape.
- Secure the fabric with wood blocks or binder clips to help create repeating squares.
- Prepare Dye Bath: Mix pre-reduced indigo dye, soda ash, and reactive dyes per the instruction booklet to form the dye bath.
- Dye: Using gloves, dip the folded fabric into the indigo vat, repeating the dips as needed for good quality.
- Rinse & Dry: Rinse in a bucket of clean water or washing machine, remove the clips or wood blocks, and hang dry to reveal the grid pattern.
Criss-Cross Indigo Tie Dye Stripes (Plaid Effect)
Horizontal and Vertical Stripes Form a Plaid-Like Pattern.
- Preparation (Optional): Pre-wash the fabric with mild detergent, rinse in cold water, and dry.
- Fold:
- Lay the fabric flat and fold it horizontally into long accordion pleats.
- After all horizontal pleats are made, fold vertically using the same accordion fold technique.
- Secure with elastic bands, binder clips, or wood blocks to create evenly spaced stripes.
- Prepare Dye Bath: Prepare the indigo dye vat by mixing pre-reduced indigo dye, soda ash, and reactive dyes per the instruction booklet.
- Dye: With gloves on, dip the folded fabric into the dye bath and soak for several minutes. Repeat the number of dips until the desired shade is reached.
- Rinse & Dry: Rinse thoroughly, remove the bands or clips, and air dry to reveal the plaid-like pattern.
Ice Dye with Indigo for Unique Color Blends
Ice-Cube-Dyed Fabric Creates Soft, Unpredictable Color Blends.
- Preparation (Optional): Pre-wash the fabric thoroughly with mild detergent, rinse, and dry completely.
- Fold:
- Lay the fabric flat and scrunch or pleat it into random shapes.
- Place the fabric on a rack above a tray or tub to catch excess dye.
- Add Ice and Dye:
- Cover the fabric completely with ice cubes.
- Sprinkle indigo dye (or other reactive dyes) over the ice cubes.
- Allow the ice to melt slowly over several hours, leaving beautiful shades of unpredictable color blends.
- Rinse & Dry: Rinse the fabric in a bucket of clean water or washing machine to remove excess dye. Hang dry to see the unique ice-dye pattern.
Indigo Resist Paint Technique (Batik Style)
- Preparation (Optional): Pre-wash the fabric thoroughly and dry completely.
- Apply Resist Paint: Use a resist paint (also called batik wax or liquid resist) to paint patterns or shapes directly onto the fabric. This paint will prevent the dye from penetrating these areas, leaving them undyed.
- Dry: Allow the resist paint to dry completely before dyeing.
- Prepare Dye Bath: Mix the indigo dye kit according to the instructions, creating an indigo vat.
- Dye: Dip the fabric into the dye vat while wearing gloves. Let it soak to achieve the desired shade.
- Rinse & Dry: Rinse thoroughly in a bucket of clean water or washing machine. Let it dry, then peel off the resist paint to reveal the pattern.
How to Wash Indigo Tie Dye Fabric
Learn the best way to wash indigo tie dye so your patterns last. Follow these simple steps to rinse, wash, and dry your fabric without fading.
- Let the dye set
After dyeing, let your indigo tie dye sit for at least 24 hours before rinsing. This allows the indigo to fully oxidize and bond to the fabric fibers.
- Rinse in cold water
Rinse the fabric in cold water until the water runs clear. For extra colorfastness, add ½ cup vinegar or a handful of salt to the first rinse.
- Wash gently and separately
Place the fabric in the washing machine on a gentle cycle with mild detergent. Wash it separately for the first few washes to prevent excess dye from transferring.
- Avoid bleach and hot water
Skip bleach and hot washes, which can strip away indigo color and damage fibers. Cold water is best for long-lasting results.
- Air-dry the fabric
Hang your fabric to dry in the shade. Avoid direct sunlight, which can fade indigo more quickly. Once dry, you can iron on a low setting to smooth wrinkles.
Want more details? We’ve created a details step-by-step guide on how to wash a tie dye shirt.
Indigo Tie Dye FAQs
Indigo is one of the world’s oldest dyes, traditionally made from plants. It produces vibrant blue shades, which are often associated with denim and beautiful home decor.
The time needed for indigo dye to set can vary based on the desired color intensity and the type of fabric used. Generally, after dipping the fabric into the indigo vat, you should allow it to oxidize in the air for about 10-20 minutes. This oxidation process reveals the characteristic blue color.For a deeper shade, repeat the dipping and oxidation process several times, allowing the fabric to oxidize for the same amount of time between dips. Once you’ve achieved your desired color, let the dye set on the fabric for at least 24 hours before rinsing it thoroughly. This will ensure the dye has fully bonded with the fibers, giving you the best results.
The Japanese word “shibori” refers to a traditional method of dyeing fabric using resist techniques to create intricate patterns. It involves folding, twisting, compressing, or tying the fabric before submerging it in dye, which prevents the dye from penetrating certain areas, resulting in distinctive patterns. Common shibori techniques include binding with string, folding and clamping between wood blocks, and using elastic bands, each producing unique and beautiful designs. Shibori has been practiced in Japan for centuries, and its patterns continue to inspire modern dyeing and textile art.
Pre-wash fabrics with mild detergent to remove any finishes or dirt that could interfere with coloring fabrics.
Following the instruction booklet of your indigo dye kit or Jacquard products, mix pre-reduced indigo dye with soda ash and other components, ensuring the mixture remains oxygen-free.
Indigo dye works best on natural fibers like cotton, linen, and silk. It can be used to dye items like tote bags, scarves, blue jeans, and other fabric projects.
Indigo dye has a historical overview dating back thousands of years. It was valued for its deep color and used in various cultures for textiles and garments.
With proper care (cold wash, no bleach, air dry), indigo patterns last for years without fading.
Related Posts
- Easy Tie Dye Patterns For Kids: Discover simple and fun designs that are perfect for young crafters to try, from spirals to stripes.
- Tie Dye Party: Fun & Creative Ideas for 8-12 Year Olds: Plan the ultimate tie-dye party with these engaging activities and tips tailored for kids.
- 100 Outdoor Activities Your Kids Will Love: Looking for more creative outdoor fun? Check out this list of activities that will keep your kids entertained all day long.

Calie Herbst, Editor-in-Chief of Milwaukee With Kids, has spent over a decade combining her experiences as a parent of three to create a hub for Milwaukee’s family adventures.
Her decade-long teaching career in Milwaukee Public Schools and academic background, including a Master’s in Teaching from Marquette University and dual B.A.s in Sociology and Spanish from the University of Wisconsin – Madison, fuel her passion for inclusive and engaging family content.
Calie is also a recognized voice in local media, contributing to WISN Channel 12 News, WTMJ Wisconsin Morning News, Fox 6’s Real Milwaukee, and B93.3.
Discover more about Calie’s journey and editorial approach on her About Page and Editorial Policy Page.
")


")
